Maybe she was born with it, maybe its the quarantine, or maybe it’s just that holiday spirit. Whatever the reason, I have been crafting like crazy this season.
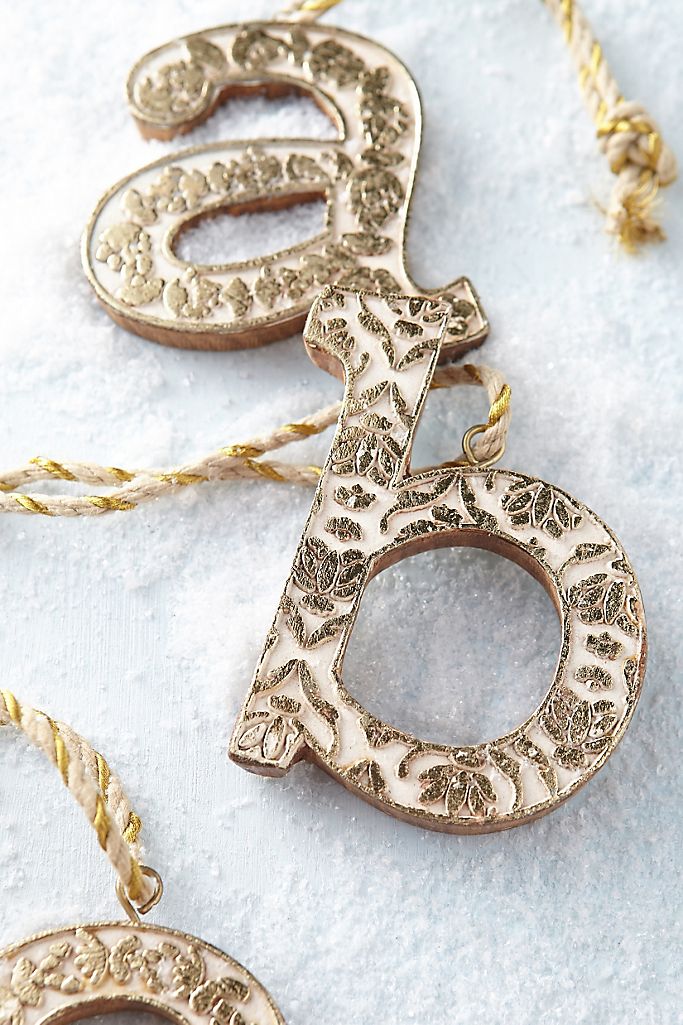
Liam and I have been working hard on our painting skills, a skill that I am lacking and he is already thriving. So while we were painting and looking for a new project, I decided to try painting some new ornaments for the tree and I was inspired by my favorite Anthropologie vined monogram ornaments.

There is a back story to these ornaments that I will make as short and sweet as possible. About 4 years ago Anthropologie released these beautiful, gold vined monogramed ornaments that I purchased for Will, Liam and myself.

Fast forward three years later and Bear was born so naturally I HAD to have the letter “B” for Bear. But they were sold out everywhere. And I searched far and wide calling Anthropologie stores and outlets across the nation! True story, I really did that. But to no avail and I finally gave up.
So luckily they restocked them this year and I was able to purchase my coveted letter B. But while searching, I stumbled across this amazing tutorial from Lucy at Craftberry Bush. I will give Lucy all the credit for this tutorial because I would of never thought to make my own, but it has been a fun few days working on them and now I am making ornaments for everyone in our family.

So since Anthropologie is once again selling out these ornaments like hot cakes, here is the tutorial so you too can make your own!
SUPPLIES NEEDED:
- gold leaf foil paper
- white paint (I just used leftover sample paint from our garage)
- white puffy paint
- wooden letters (the Anthro ones are about 5×3 inches but I also bought a pack of mini 2 inch letters for gift tags)
- baker’s twine or jute
- drill with a small drill bit
- (optional) small 5mm screw eyes (gold is preferred, I only had silver on hand)


STEP 1: drill a hole on the top to twist on the screw eyes for larger ornaments or drill a hole directly into the letter for the smaller ones.
STEP 2: Paint your wooden letter white and let it dry.
STEP 3: With the fine tip of the puffy paint draw vines (or in my case squiggly lines and polka dots) on the letter. Also trace around the the edge of the letter with the puffy paint. Let it dry until it is almost dried completely but still sticky (this took about an hour. If you touch it and it smudges then wait longer.)
STEP 4: Carefully place the gold leaf paper on top of the letters and push down onto all the edges. The tackiness of the paint will allow the leaf to adhere.
STEP 5: Slowly remove the excess gold paper using a toothpick to push and scrape away gold leaf from the white areas (this part is tedious but not unbearable).
STEP 6: Add your twine to hang and enjoy!
At first I thought this was going to be a huge Pinterest fail as the gold leaf paper was flopping everywhere and sticking to everything I touched, but I finally found my groove and now I can’t stop making them for all the nieces and nephews. And once we decide on names for the new babies, I can’t wait to make two more for them to have hanging by their stockings!
xx Priscilla


Other holiday decor seen in this post: frosted bottle brush tree candle // faux pine garland // white faux fur stockings (similar sherpa stockings)


