Every year I bake a batch of sugar cookies and decorate them to look like snow globes. But this year I decided, what if instead of just looking like a snow globe, the cookies actually ARE a snow globe?!
I recently stumbled upon a video on TikTok of a professional baker who did this and although I forgot to save the video, in my usual state of delusion fueled by caffeine and that early December holiday magic, I decided to take a swing at it and make my own version of a 3 dimensional snow globe cookie.

The key to these “3D snow globe” cookies is using Isomalt to create the “glass” or “window.” Isomalt is a sugar substitute used in baking and is the main ingredient used in making lollipops. It’s great for this project as it doesn’t turn yellow when it is heated to high temperatures like other sugars might do and because it is, of course, edible! My son who already ate his snow globe cookie described it as “having a lollipop in the middle of your cookie” which I think is a perfect description for what you are getting into!
Isomalt can be a little pricey but I found these “Isomelt Nibs” brand to be a good price and easy to work with. All the other ingredients you probably already have in your kitchen! Here is what else you will need to get started.

Ingredient List
- 4 cups of all purpose flour
- 2 tsp baking powder
- 1 tsp salt
- 1.5 sticks of soft butter
- 1.5 cups of sugar
- 2 eggs
- 1.5 tsp vanilla extract
- approximately 7oz of Isomalt
- royal icing for decorating (2 cups powder sugar, 3 tbl milk, and 1 egg white)
- butter cream frosting for the “glue”
- powder sugar (optional for decorating)
- blue food coloring (optional to add to icing)
- holiday themed sugar decoration topper
- white sprinkles for inside the snow globe

Going into this I thought the hardest part of the project would be making the cookies with a hole cut out in the middle. As it turns out, this was quite simple with no cookie cutters required. I used a cocktail glass to stamp out my dough into circles for the cookies and a champagne glass to stamp out the interior circle for the “window” of the snow globe.
The hardest part of this entire project in fact was keeping the sprinkles from sticking to the icing as you are assembling the two layers of cookies! So for presentation purposes, I would say these cookies may not do well traveling across town in a cookie carrier. So instead I placed them flat on a tray and my family was all given a chance to pick up their “snow globe” and give it one good shake before chowing down!

Directions
- Mix your dry ingredients in a bowl. Set aside.
- In another bowl, mix the butter and sugar until fluffy.
- Add the eggs and the vanilla and continue to mix well.
- Slowly add in all the dry ingredients. The dough should be smooth and stiff.
- Lay out parchment paper lightly dusted with powder sugar and roll out your dough.
- On the paper, cut cookies into ¼ in. round cookies.
- For half of the cookies cut an additional small circle cup out of the middle using a champagne glass for this circle.
- Bake both sets of cookies for 10 minutes at 350 degrees.
- Cool completely before decorating.
- Once cooled, lay the cookies onto parchment paper.
- Follow the directions on the package to melt your Isomalt.
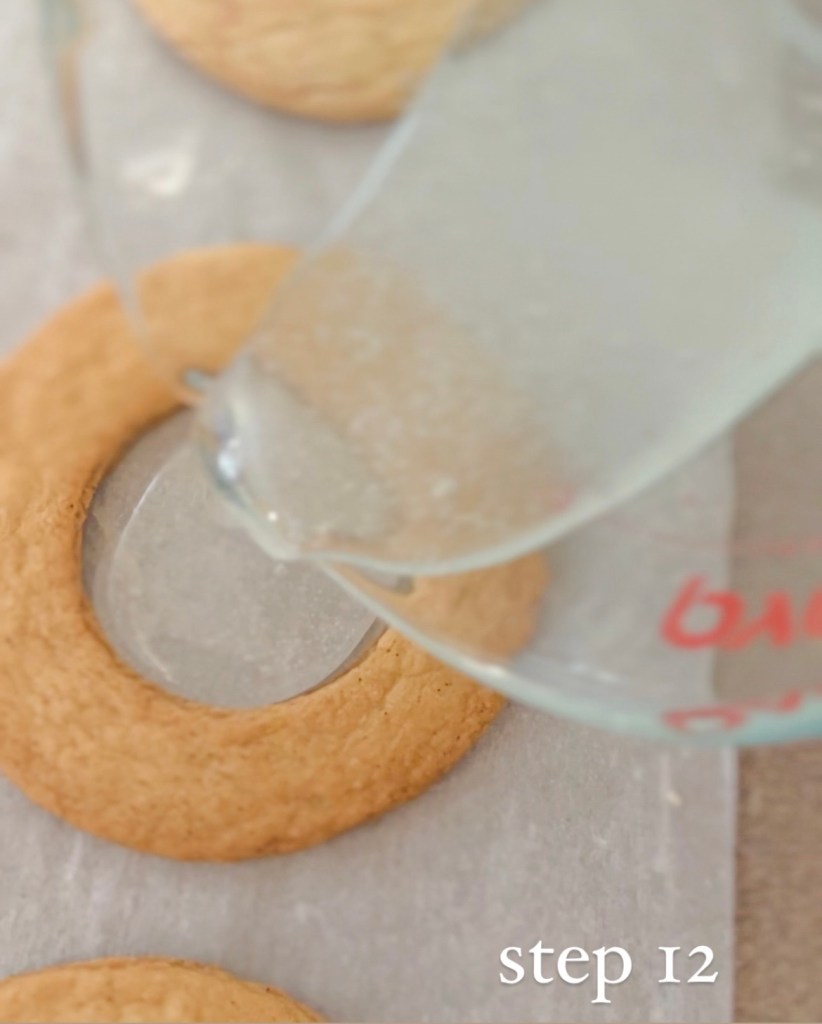
- Immediately remove the melted Isomalt from stove or microwave and pour into the center circles of the cookies. Wait about 10 minutes for this to harden before peeling off the parchment paper.
- Use your royal icing to decorate the front of the cookies.
- Add a border of frosting around the inside rim of the cookies that DO NOT have the Isomalt to act as the “glue” between the two cookies.
- Carefully place 5-10 sprinkles on the center of this cookie.
- Place the top cookie onto the bottle cookie layering with the sprinkles and frosting inside.
- Add any holiday icing decoration to the top of the cookies.
- Give the cookie a little shake and watch the magic unfold!


Shop This Post:


